No cleaning closet? Welcome to the club.
Maybe you live in an apartment with limited storage, or perhaps every closet in your house is already occupied by coats, shoes, and things you’re definitely going to sort through someday.
Meanwhile, the mop has been leaning against the wall “just for now” for three months, and the cleaning supplies have somehow claimed an entire cabinet.
The good news? You don’t need a dedicated cleaning closet to keep everything organized. With a few smart storage spots and simple systems, you can make cleaning supplies easier to find without sacrificing valuable living space.
Here are seven practical cleaning supply storage ideas that work even when closet space is limited.
Before You Organize, Take Inventory
Before buying bins, baskets, or organizers, take a few minutes to see what you’re actually storing.
Gather your cleaning supplies, check what you have, and look for products you no longer use. You might discover three nearly identical sprays, a collection of worn-out sponges, and a bottle of something you don’t even remember buying.
Set aside supplies you regularly use and check product labels for storage, expiration, and disposal instructions. Dispose of unwanted products according to their labels and local guidelines rather than combining leftover cleaners or pouring chemicals together.
Once you’ve narrowed things down, it’s much easier to figure out how much storage you actually need.
A Quick Safety Reminder
Always keep cleaning chemicals in their original, clearly labeled containers and follow the manufacturer’s storage instructions. Never mix cleaning products, particularly bleach with ammonia or acids.
If children could access your supplies, store hazardous products in locked cabinets or other secure storage. A decorative basket or ordinary lid isn’t a substitute for a child-resistant storage setup.
Nook & Noted Tip: Before buying a single organizer, gather your supplies and see what you already own. You may discover that one small caddy is all you really need.
1. Make the Most of the Space Under Your Kitchen Sink
The cabinet under the kitchen sink is often the closest thing a small home has to a cleaning closet.
Unfortunately, it’s also where bottles tend to get pushed behind pipes, sponges disappear into dark corners, and that one mysterious container lives for years without anyone touching it.
The solution is to give the space a little structure.
Start by measuring the available width, depth, and height around the plumbing. Then choose a storage option that fits the space without blocking pipes or making it difficult to check for leaks.
A compact handled caddy works well for frequently used supplies. A shallow pull-out organizer can also make it easier to reach items stored toward the back.
Work Around the Plumbing
You don’t need to fill every inch of the cabinet.
Leave room around the pipes, keep bottles upright, and consider adding a water-resistant mat to protect the cabinet floor from minor drips.
If you’re thinking about installing a tension rod to hang spray bottles, make sure it’s securely supported and suitable for the weight. For most small cabinets, a sturdy caddy is a simpler option.
And if children could access the cabinet, use appropriate child-resistant locks or choose another secure storage location.
Nook & Noted Tip: Measure around the pipes before buying an organizer. A compact pull-out or handled caddy that actually fits is much more useful than a complicated system that blocks the plumbing.

2. Use the Back of a Door for Lightweight Cleaning Supplies
The back of a door is one of those overlooked storage spots that can be surprisingly useful in a small home.
An over-the-door organizer can hold microfiber cloths, rubber gloves, spare sponges, and small cleaning brushes without taking up shelf or floor space.
The inside of a laundry room door, utility closet door, or another suitable storage door may work well.
Keep the Organizer Shallow
Before buying anything, check how much clearance you have when the door closes.
A bulky organizer that hits shelves or prevents the door from closing properly isn’t going to make your home feel more organized.
Look for something shallow and lightweight, and avoid overfilling the pockets.
For safety, reserve this type of open organizer for nonchemical cleaning supplies rather than bottles of household cleaners.
You don’t need a fancy system, either. A simple hanging organizer in a neutral color can blend into the space without drawing much attention.
Nook & Noted Tip: Check the door clearance before adding an organizer. A shallow one that closes comfortably is much more useful than one that gets in the way every time you open the door.

3. Keep Everyday Essentials in a Portable Cleaning Caddy
If you don’t have a cleaning closet, a portable caddy might be the simplest solution of all.
Instead of storing supplies in several random places and making repeated trips to find what you need, keep your most-used products together in one sturdy container.
A basic cleaning caddy might hold:
- All-purpose cleaner
- Glass cleaner
- A few microfiber cloths
- A small scrub brush
- Rubber gloves
Choose a caddy with a sturdy handle and a stable base that keeps bottles upright. You don’t need to fill every compartment.
When it’s time to clean, grab the caddy and take it from room to room.
When you’re finished, return it to its designated secure cabinet or utility storage area.
Consider a Small Bathroom Caddy
If you’re constantly carrying the same bathroom supplies back and forth, a second small caddy might make sense.
Keep only the essentials you use regularly, and store it securely in a suitable bathroom cabinet or another appropriate location.
This can make quick bathroom cleanups easier without requiring a large collection of products.
Of course, there’s no need to buy two caddies immediately. Start with one and see how well it works for your routine.
Nook & Noted Tip: Start with one caddy before buying multiple organizers. If you find yourself constantly carrying the same supplies between rooms, a second small setup might be worthwhile.

4. Try a Slim Rolling Utility Cart
Sometimes a small home has an awkward gap that isn’t quite big enough for furniture but could still provide useful storage.
A narrow rolling utility cart can turn one of those spaces into a practical spot for cleaning supplies.
Depending on your layout, a cart might fit beside a washing machine, along a utility wall, or in another unused corner.
Use the shelves for folded cleaning cloths, spare sponges, brushes, and other lightweight cleaning accessories.
Keep heavier items on lower shelves so the cart stays stable.
Measure More Than Just the Gap
Before buying a rolling cart, measure the width, depth, and height of the available space.
Then think about how you’ll actually use it.
Can the cart roll forward without hitting a door? Will it block a walkway? Does it interfere with opening the washer or another appliance?
Also check that the storage location doesn’t block appliance ventilation or required service access.
An open rolling cart is best for nonchemical supplies when children or pets could reach it. Store hazardous cleaners separately in secure, appropriate storage.
Nook & Noted Tip: Measure the entire space, including the room needed to pull the cart out. A cart that fits the gap but can’t roll forward isn’t much of a storage solution.

5. Create a Vertical Storage Spot for Brooms and Mops
Brooms, mops, and dusters have a talent for falling over at exactly the wrong moment.
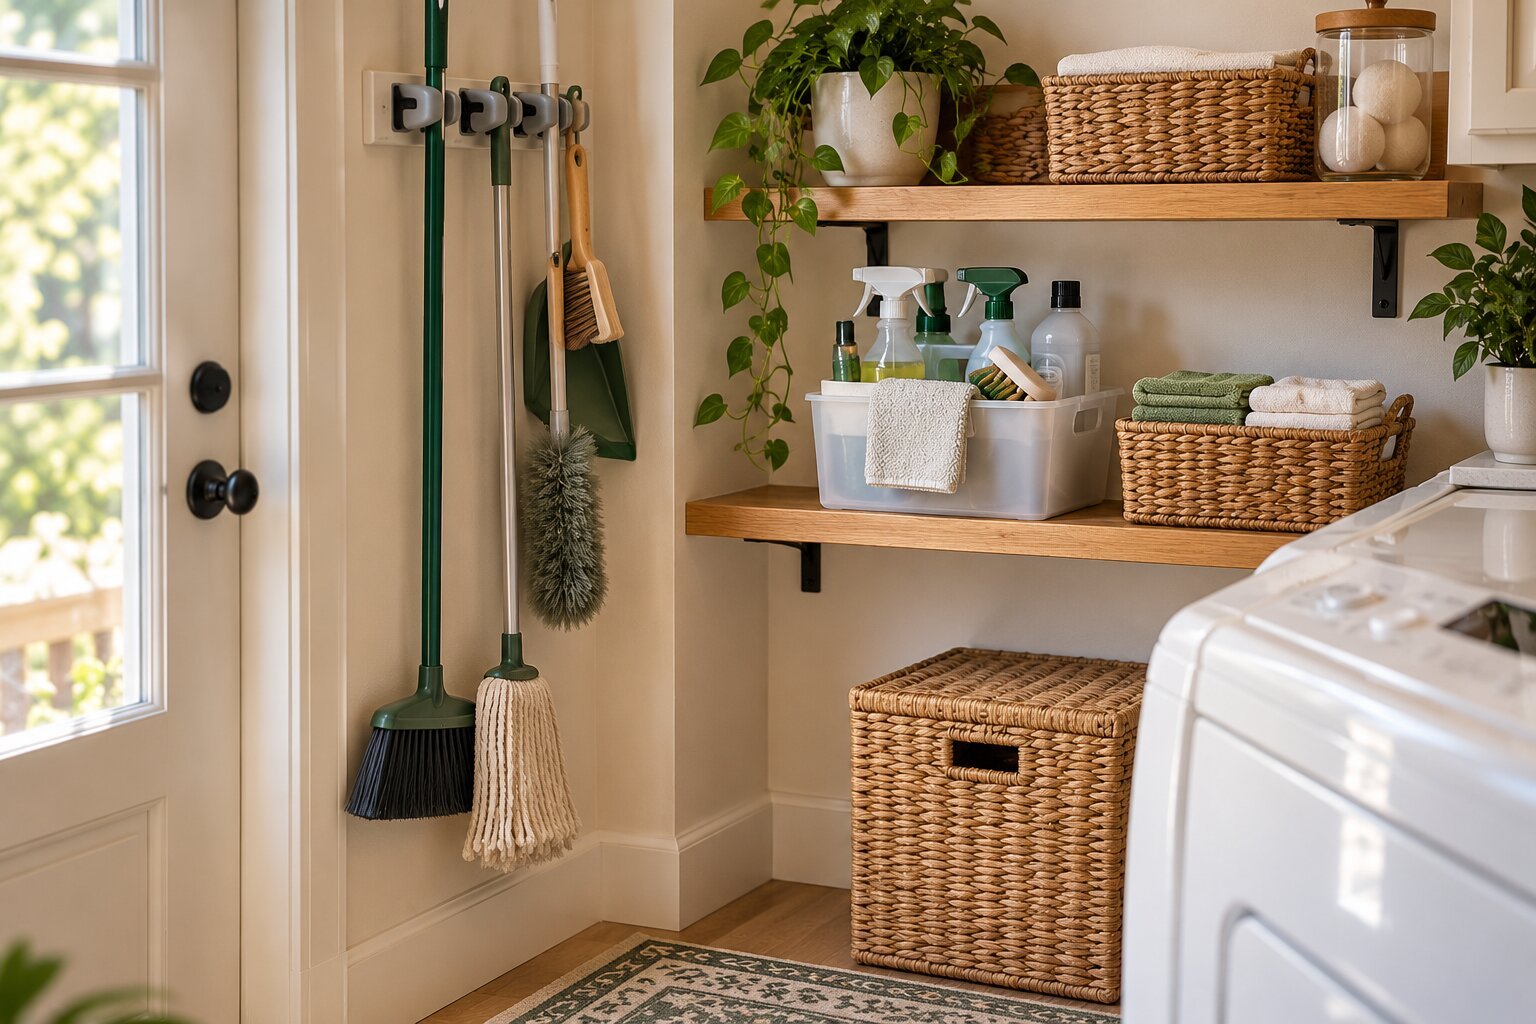
If yours are currently leaning in a corner or tucked behind a door, a simple wall-mounted holder can make a big difference.
A grip-style broom and mop organizer keeps long-handled tools upright and off the floor without taking up much space.
Look for a suitable wall in a laundry nook, utility area, garage, or another out-of-the-way location.
Choose the Right Hooks or Holders
A properly installed wall-mounted holder is usually the best option for heavier cleaning tools.
If drilling isn’t possible, over-the-door hooks or appropriately rated adhesive hooks may work for lightweight dusters, squeegees, and similar items.
Just make sure the mounting method is suitable for the surface and the weight of the item.
Avoid hanging heavy equipment, such as a handheld vacuum, from ordinary adhesive hooks unless the manufacturer specifically supports that use.
And don’t forget to leave enough room for mop heads to dry properly before storing them.
Nook & Noted Tip: Hang brooms and mops high enough that their heads don’t rest on the floor, and allow wet mop heads to dry completely before putting them away.

6. Use Simple Bins to Group Cleaning Tools and Extras
Not everything related to cleaning needs to live in a cabinet full of spray bottles.
Microfiber cloths, spare sponges, replacement brush heads, and dusters can be grouped into simple bins on a shelf or inside a storage cabinet.
This is especially helpful when you have limited space and don’t want small supplies scattered across several drawers.
Group Supplies by Purpose
Try creating a few basic categories:
- Cloths: Microfiber cloths, dusting cloths, and reusable cleaning rags
- Scrubbing supplies: Spare sponges, brushes, and replacement scrubber heads
- Extras: Nonchemical replacement accessories and other small cleaning tools
You don’t need matching containers or expensive storage baskets.
Simple plastic bins, small baskets, or sturdy containers you already own may work perfectly well.
Labels can make the system easier for everyone in the household to use, especially when containers aren’t transparent.
Keep chemical cleaning products separately in their original containers and store them securely according to their labels.
Leave a Little Breathing Room
Try not to pack every container completely full.
Leaving some open space makes it easier to see what you have and put things away without rearranging everything.
After all, the goal is to make cleaning supplies easier to manage—not create another storage puzzle.
Nook & Noted Tip: Save the pretty baskets for clean, dry supplies. They’re perfect for cloths and dusters, but chemical cleaners need practical, secure storage.

7. Store Cleaning Supplies Where You Actually Use Them
Who says every cleaning supply has to live in the same place?
If you don’t have a dedicated cleaning closet, storing supplies near the rooms where they’re used can make more sense than trying to squeeze everything into one cabinet.
Think about the cleaning tasks you do most often and where the supplies would be most convenient.
For example:
- Bathroom: Keep bathroom cleaning tools and securely stored bathroom cleaners nearby.
- Laundry area: Store laundry-related supplies in appropriate cabinets or shelves.
- Kitchen: Keep everyday kitchen cleaning essentials in a secure, convenient location.
- Living areas: Store a lightweight duster or microfiber cloth in a nearby drawer.
- Utility area: Keep larger tools, such as a vacuum or bucket, in a suitable corner or cabinet.
The idea is to create a few small cleaning zones that fit your daily routine.
Keep the System Simple
You don’t need a separate container for every room.
Sometimes one portable caddy and a couple of strategically placed storage spots are enough.
Pay attention to which supplies you use most often and where you naturally reach for them.
Keep cleaning chemicals away from food and store them according to their labels, avoiding unsuitable locations such as under beds, damp areas, or places exposed to extreme temperatures.
Nook & Noted Tip: Your cleaning supplies don’t all have to live together. A few well-chosen storage spots can work better than one overflowing cabinet.
A Few Habits That Keep Cleaning Supplies Organized
Getting cleaning supplies organized is one thing. Keeping them that way is what makes the system worthwhile.
Fortunately, you don’t need a complicated routine to keep things under control.
A few simple habits can help:
- Return supplies to their assigned spots. When everything has a home, putting things away takes less time.
- Keep only what you use. Avoid stocking up on products simply because they’re on sale, especially when storage space is limited.
- Check supplies once a month. See what’s running low, clean up any spills safely, and make sure containers are in good condition.
- Keep storage simple. If an organizer is difficult to reach or use, consider a better location.
You can also take a few minutes during your regular cleaning routine to straighten the caddy, return misplaced tools, and check whether anything needs replacing.
Small habits like these can keep your cleaning storage from slowly turning into another cluttered corner.
Nook & Noted Tip: The best cleaning storage system is one that’s easy to maintain on an ordinary Tuesday—not just the day you organize everything.
A Cleaning Closet Isn’t Required
You don’t need a dedicated closet or an expensive storage system to keep cleaning supplies organized.
A compact caddy, a few well-chosen storage spots, and a simple wall holder for brooms and mops can make a surprising difference.
The key is choosing solutions that fit your home, keeping supplies safely stored, and making everything easy to find when you need it.
Start with one problem area, use what you already have when possible, and build a system that works for your space.
Because cleaning is enough of a chore without having to hunt down the supplies first.
Looking for More Home Organization Inspiration?
Looking for more ways to make your home feel organized and functional? Explore practical organization ideas, small-space solutions, and clever home finds from Nook & Noted.