Under-sink cabinets are the junk drawers of the cabinet world: dark, awkward, and somehow always full of half-empty spray bottles lying on their sides.
Add drainpipes, a garbage disposal, and a few oddly placed plumbing connections right through the middle, and suddenly a perfectly good cabinet can feel almost impossible to organize.
The solution isn’t filling every inch with organizers. It’s learning to work around the plumbing instead of against it.
Think of the cabinet as several separate storage zones: the taller open space beside the pipes, the shorter space underneath them, the inside of the cabinet doors, and the narrow areas along the sides.
Once you know what will fit in each zone, creating an under-sink organization system becomes much easier.
Here are 12 practical under-sink organization ideas to help you make better use of all that awkward space.
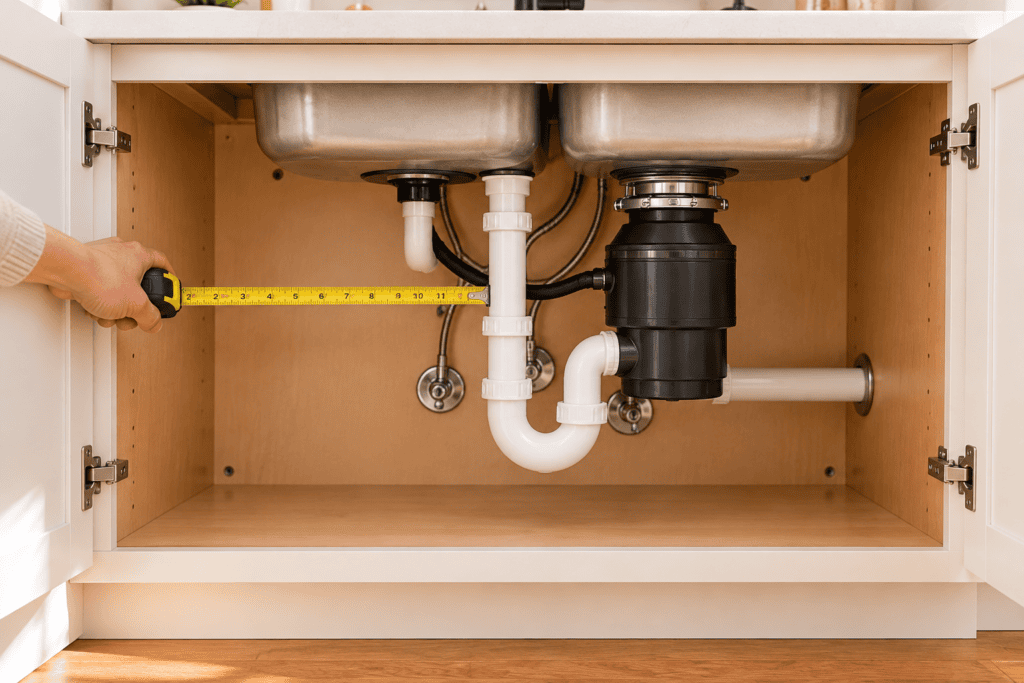
Before You Buy Anything: Measure Around the Plumbing
This is the step that’s easiest to skip—and probably the one that will save you the most frustration.
Under-sink cabinets are definitely not one-size-fits-all.
Before buying bins, drawers, shelves, or racks, empty the cabinet and measure:
- Interior width
- Interior depth
- Interior height
- Available width on each side of the plumbing
- Height underneath the lowest pipe
- Space occupied by a garbage disposal, if you have one
- Clearance between the cabinet doors and anything you plan to put inside
Pay particular attention to the P-trap—the curved section of pipe beneath the sink. An organizer may technically fit inside your cabinet but still be too tall to slide underneath the plumbing.
Also check the cabinet at more than one point. Pipes, disposal units, hinges, and other obstacles can dramatically change how much usable space you actually have.
Nook & Noted Tip: Take a photo of the empty cabinet and save the measurements in your phone before you shop. When you’re comparing organizers, you’ll have both the dimensions and the plumbing layout right in front of you.
1. Start With a Clean, Dry Cabinet
Before adding a single organizer, take everything out.
Yes, everything.
It’s much easier to figure out what your cabinet actually needs when you’re looking at an empty space instead of trying to organize around years of accumulated cleaning products.
Wipe down the cabinet floor and look for signs of moisture, staining, warped wood, or slow leaks around the plumbing.
If you find moisture, deal with the source before covering the area with bins and organizers.
Then sort through everything you removed.
Get rid of empty containers and dispose of household products you no longer need according to their labels and local disposal guidance. Combine duplicates when appropriate, and move anything that doesn’t really belong under the sink somewhere else.
You may discover that you need fewer organizers than you thought.
Consider Adding a Water-Resistant Liner
Once the cabinet is clean and dry, consider adding a water-resistant shelf liner or under-sink mat.
It won’t solve a plumbing leak, but it can make everyday drips and spills easier to clean up.
Choose something that’s easy to wipe clean and sized so you can still inspect the cabinet for signs of moisture.
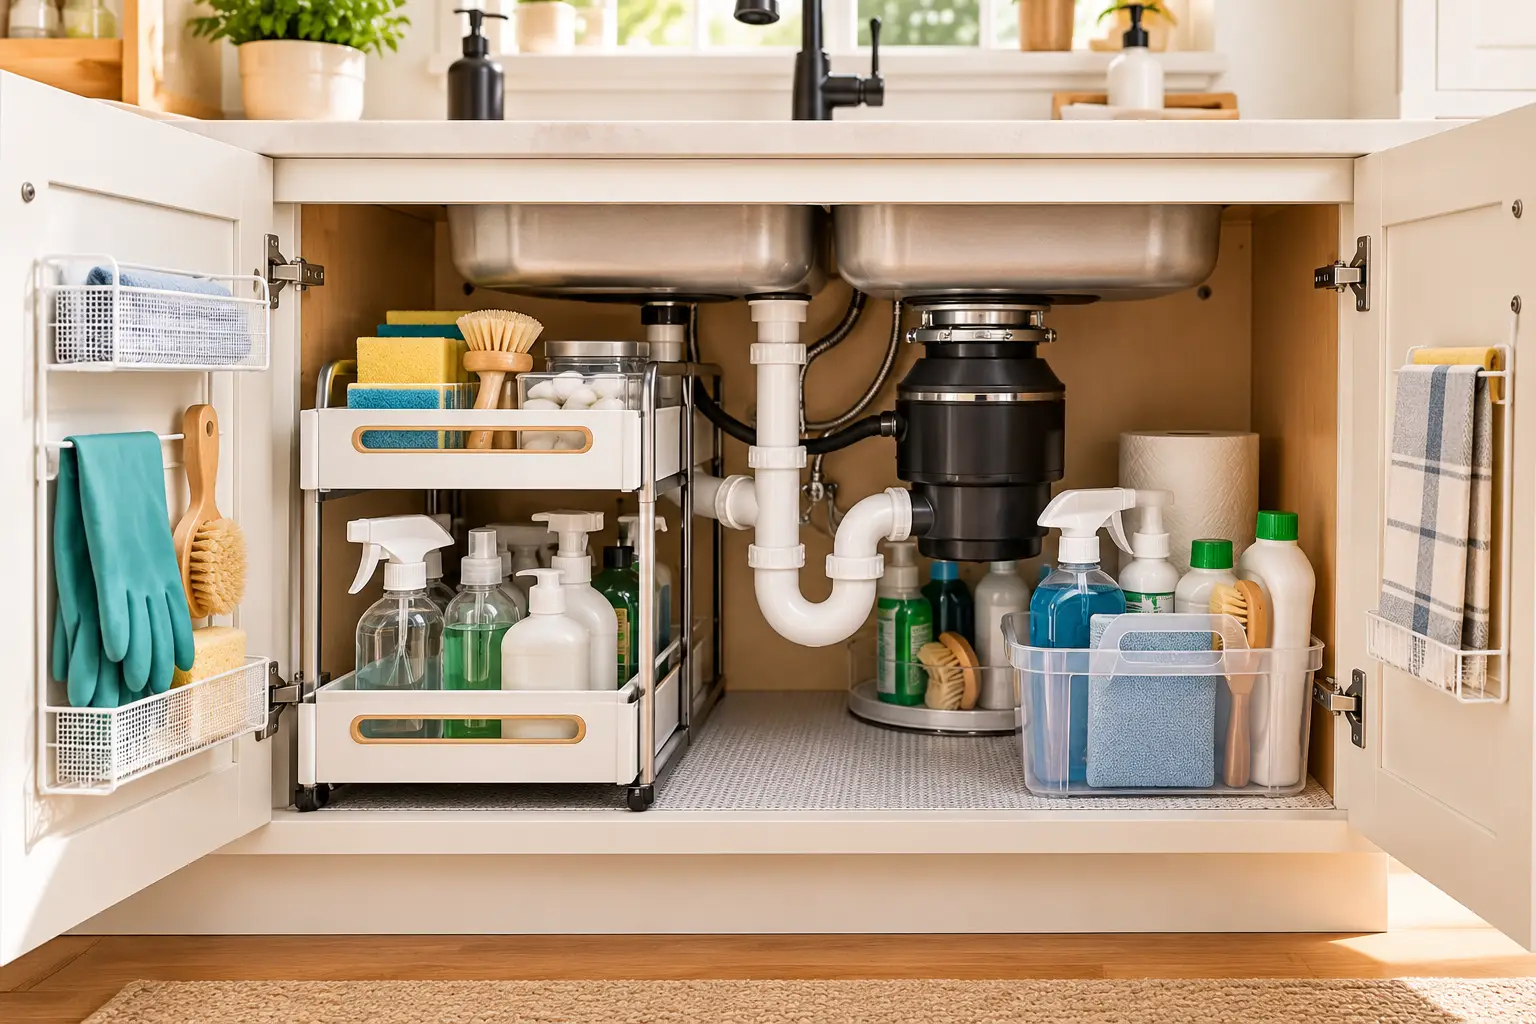
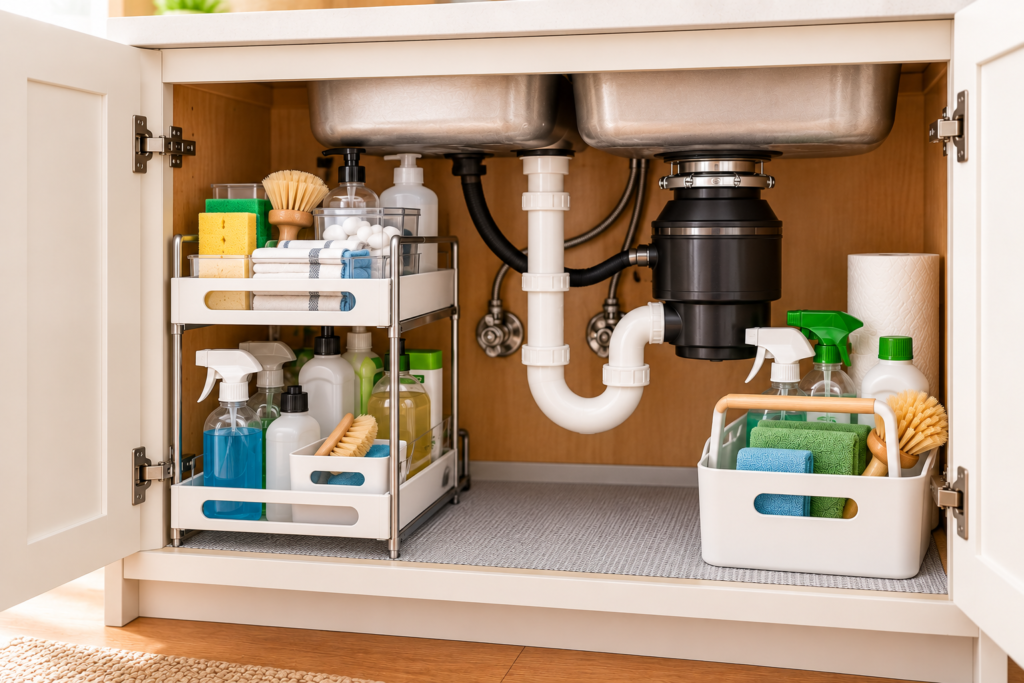
2. Add a Two-Tier Sliding Organizer
If you’re going to add one substantial organizer, a two-tier pull-out system is a strong place to start.
Under-sink cabinets often have plenty of vertical space that goes completely unused. A two-level organizer takes advantage of that height while pull-out drawers make items in the back easier to reach.
Use the upper level for smaller supplies such as:
- Sponges
- Dishwasher tablets
- Brushes
- Cleaning cloths
- Gloves
Taller bottles can go on the lower level or alongside the organizer.
Before choosing one, measure carefully around the plumbing. An adjustable or expandable design may provide more flexibility in an unusually shaped cabinet.
Also check whether the drawers can slide out independently and whether your taller bottles can stand upright.
Most importantly, make sure the upper tier won’t collide with the plumbing.
Nook & Noted Tip: Don’t automatically center the organizer. Placing it completely on one side of the cabinet may leave you with much more usable storage around the pipes.
3. Create Another Level With a Shelf Riser
You don’t necessarily need a complicated storage system to make better use of vertical space.
If you have an open area beside the plumbing, a simple shelf riser can create a second storage level.
Store shorter supplies underneath and frequently used bottles on top.
This can work particularly well on the taller side of the cabinet where the pipes aren’t in the way.
Before buying a riser, measure both the available height and the tallest items you want to store.
The goal is to create useful storage—not squeeze two cramped layers into a space that worked better as one.
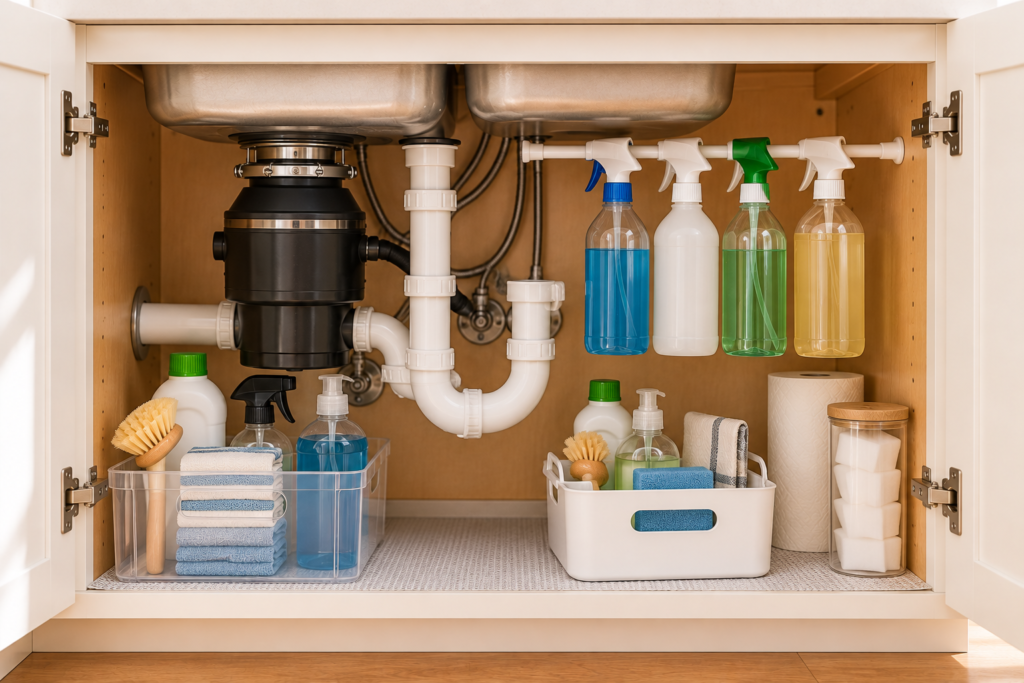
4. Hang a Few Spray Bottles From a Tension Rod
A tension rod can turn otherwise unused horizontal space into simple hanging storage.
Install one across an open portion of the cabinet and hang compatible spray bottles from their trigger handles.
That gets the bottles off the cabinet floor and leaves additional space underneath for bins, cleaning cloths, or backup supplies.
It’s inexpensive and doesn’t require permanently attaching anything to the cabinet.
Choose a tension rod with non-slip or rubberized ends and make sure it fits securely between the cabinet walls.
Don’t overload it.
Several large, full cleaning bottles can become surprisingly heavy and may cause the rod to slip.
This solution works best for a small number of lightweight bottles rather than your entire cleaning collection.
And if your spray bottles don’t hang securely from their triggers, don’t force the solution. A bin or cleaning caddy may work better.
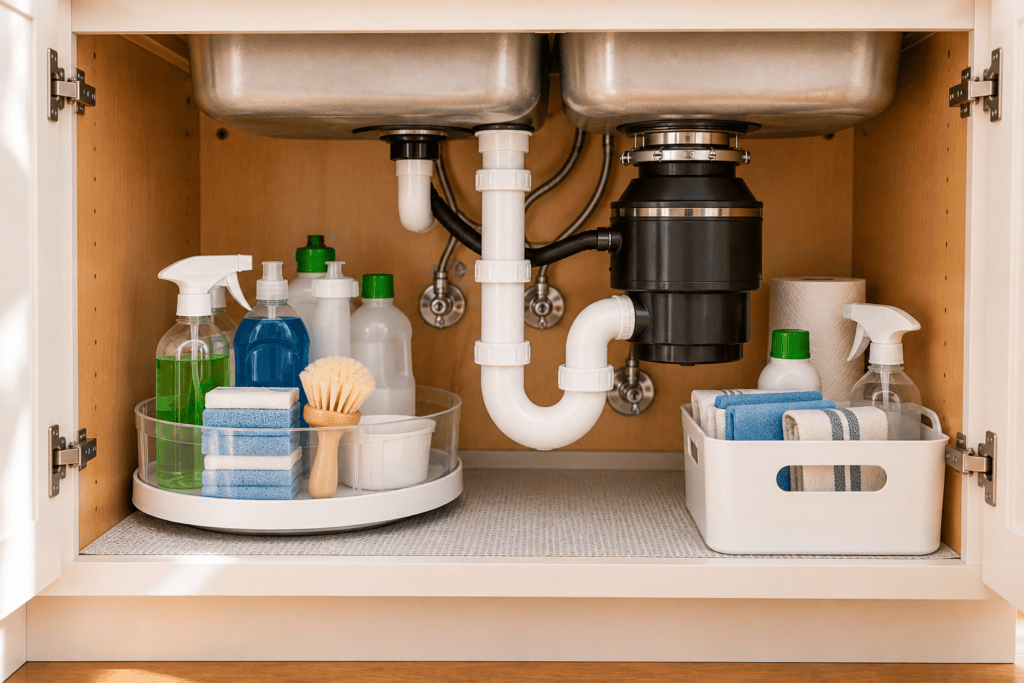
5. Put an Awkward Corner on a Lazy Susan
The space toward the back of an under-sink cabinet can be difficult to use, particularly when plumbing blocks your reach.
A small rotating organizer can make one of those awkward areas much more accessible.
Instead of reaching around bottles and pipes, give the turntable a spin to bring what you need toward the front.
It can work well for smaller items such as:
- Dish soap refills
- Specialty cleaners
- Sponges
- Small bottles
- Other supplies you want to keep grouped together
Measure both the diameter and height of the available space before buying one. A turntable with a raised outer edge can also help keep bottles upright as it rotates.
Nook & Noted Tip: Make sure you’ll actually be able to rotate the organizer once it’s inside the cabinet. Plumbing can interfere with a turntable even when its overall dimensions appear to fit.
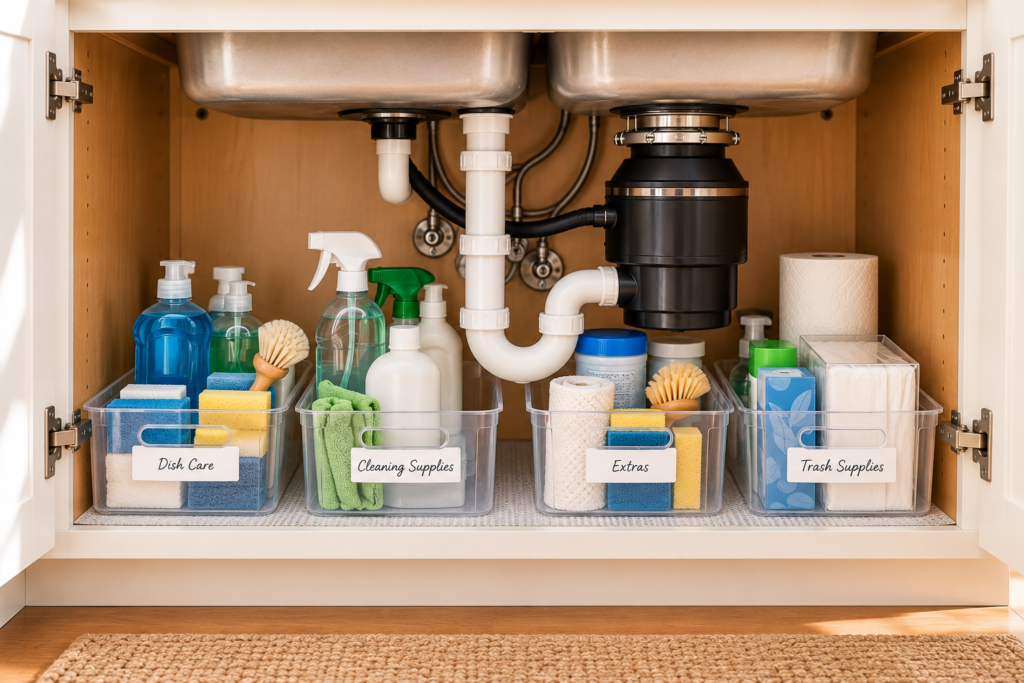
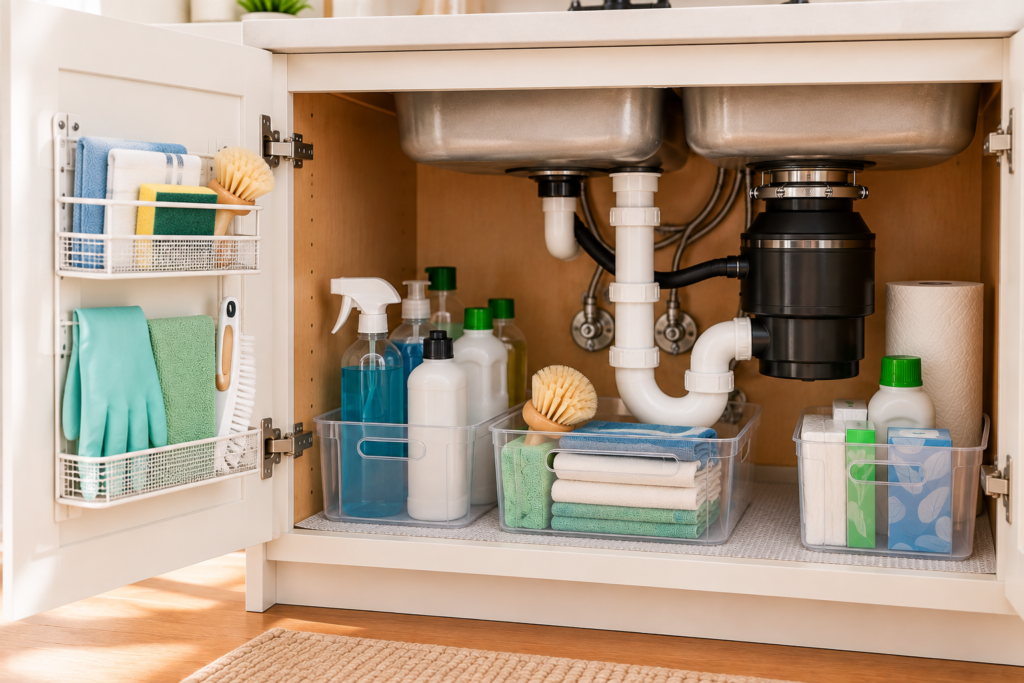
6. Group Similar Supplies in Clear Bins
One of the easiest ways to keep an under-sink cabinet organized is to stop treating every individual bottle as a separate item.
Instead, group supplies by purpose.
Then give each category its own bin.
For example:
- Dish Care: Dishwasher tablets, rinse aid and scrubbers
- Everyday Cleaning: Sprays, cloths and sponges
- Extras: Replacement sponges, gloves and brushes
- Trash Supplies: Bags and liners
Clear bins let you see what you have without pulling everything out, while also keeping smaller supplies from migrating around the cabinet.
Open-top bins are often more convenient than containers with lids because you can grab what you need immediately. Cutout handles are also useful when you need to pull a bin forward.
There’s no need to buy a giant matching set.
Measure first and choose the sizes that actually fit around your plumbing.
Nook & Noted Tip: Organize by how you use things, not simply by what the bottles look like. A useful category makes it much easier to know where something belongs.
7. Put the Inside of Cabinet Doors to Work
Don’t forget about the doors.
The inside of an under-sink cabinet door is valuable storage space that’s often doing absolutely nothing.
A shallow door-mounted rack, adhesive basket, or a few carefully placed hooks can hold lightweight supplies such as:
- Rubber gloves
- Cleaning cloths
- Small scrub brushes
- Sponges
- Dishwashing accessories
Moving these smaller items onto the door can free up cabinet-floor space for larger supplies.
The key is keeping door storage shallow.
Before permanently installing anything, check where your bins, shelves, pipes, and pull-out organizers sit when the door is closed.
Try the Painter’s-Tape Test
Use painter’s tape to mark the proposed organizer’s dimensions on the inside of the door.
Then close the cabinet slowly.
If the tape overlaps a shelf, bin, drawer, or pipe, you’ll know there’s likely to be a clearance problem before you’ve bought or installed anything.
8. Get Bulky Trash-Bag Boxes Off the Cabinet Floor
Boxes and rolls of trash bags can take up more space than you’d expect, especially when they’re shoved into the back of the cabinet.
If trash bags are consuming valuable floor space, look for a more compact way to contain them.
Depending on your cabinet layout, that might mean a compact dispenser, a small bin, or a mounted holder on an unused side wall or cabinet door.
The goal isn’t necessarily to add another organizer. It’s simply to prevent a bulky box from occupying more space than it needs.
If you’re considering a mounted dispenser, check its dimensions with the actual roll of bags inside.
An empty dispenser may fit perfectly while a full one prevents the cabinet door from closing.
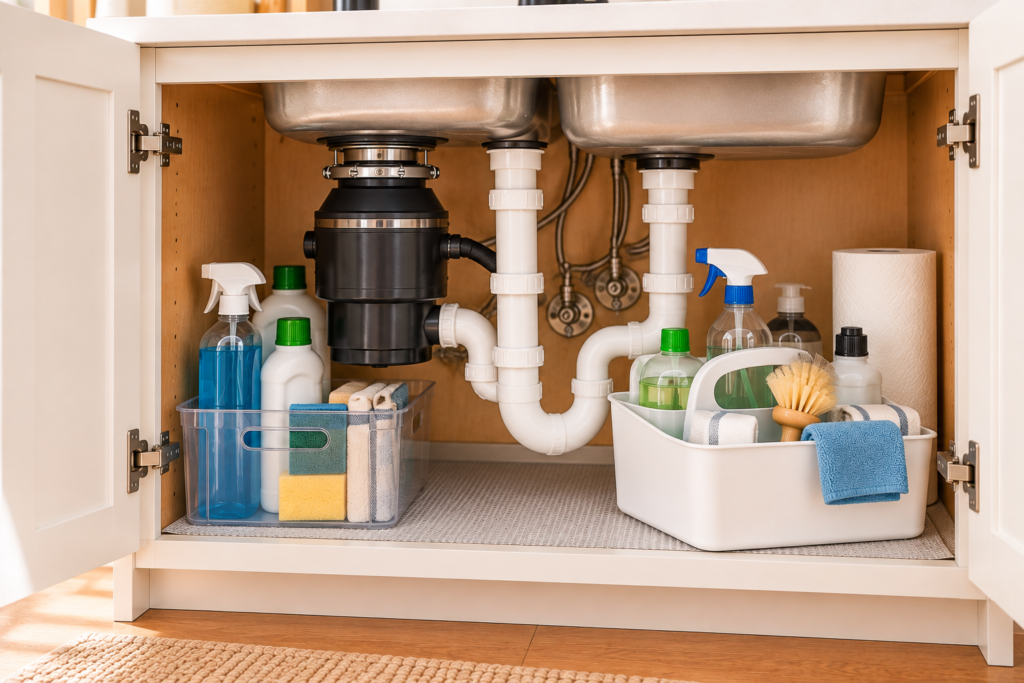
9. Create a Grab-and-Go Cleaning Caddy
Not everything under the sink needs to be permanently attached to an organizer.
Sometimes the simplest solution is a caddy with a handle.
Put the cleaning products you use most often in one portable container. When it’s time to clean, lift out the entire caddy and carry it from room to room.
When you’re finished, everything goes back to the same place.
It’s simple, but that’s exactly why it works.
Choose a caddy that’s easy to wipe clean and has a comfortable handle.
Before buying a large one, remember that you still need to maneuver it around the plumbing when taking it in and out of the cabinet.
Nook & Noted Tip: Keep only your most-used supplies in the caddy. If it becomes too heavy to carry comfortably, it defeats the purpose.
10. Don’t Forget the Narrow Side Walls
The narrow side walls of an under-sink cabinet are another easy-to-overlook storage opportunity.
A few appropriately placed removable hooks can provide a home for lightweight items without taking up much usable cabinet space.
Depending on the cabinet, they might hold:
- Small brushes
- Cleaning gloves
- Reusable cleaning cloths with loops
- A small dustpan
- Lightweight cleaning tools
This can be especially useful for renters or anyone who doesn’t want to drill into cabinetry.
If you’re using adhesive hooks, follow the manufacturer’s surface-preparation instructions and weight limits. Moisture, grease, and textured surfaces can affect adhesion.
Keep heavier supplies on the cabinet floor or another appropriately supported surface.
11. Fit a Slim Trash or Recycling Bin Around the Plumbing
If your kitchen trash lives under the sink, the bin itself may be consuming most of your available storage.
A slimmer container can sometimes free up enough space for cleaning supplies or even a second small container for recycling.
For larger cabinets, a pull-out trash system may make the area easier to use while keeping the bins tucked away.
This is another situation where measurements matter more than product photos.
Measure the usable width, depth, and height around the plumbing and garbage disposal, not simply the overall cabinet dimensions.
And remember to consider how you’ll remove the trash bag.
A bin that barely squeezes underneath the pipes may technically fit but become frustrating every time you try to lift a full bag out.
12. Leave a Small Flex Zone
Here’s one under-sink organization idea that’s easy to overlook:
Don’t organize every last inch.
An organization system that’s completely full on day one doesn’t leave much room for real life.
Eventually you’ll bring home a refill, replace a cleaning product, or temporarily need somewhere to put an extra bottle.
If possible, leave a small open area for those occasional items.
It doesn’t need to be large. Even a little breathing room can prevent one new bottle from throwing the entire cabinet back into chaos.
This also gives you a convenient temporary landing spot without forcing you to rearrange several bins every time something new enters the cabinet.
Nook & Noted Tip: Empty space isn’t wasted space if it makes your organization system easier to maintain.
Keep Your Under-Sink System Working
Even a great organization system eventually gets messy.
A new bottle gets tossed in. Someone puts the sponges in the wrong bin. Empty containers accumulate in the back.
Every few months, take a few minutes to reset the cabinet.
You don’t necessarily need to empty everything again.
Pull the bins forward, wipe up spills, get rid of empty containers, return misplaced items to their categories, and check around the plumbing for signs of moisture.
Then ask one simple question:
Is the system still working?
If everyone keeps putting an item somewhere other than the place you originally chose for it, that may be a sign that the storage location—not the person—is the problem.
Good organization should make everyday life easier, not create another set of rules to follow.
If You Only Do Four Things, Start Here
You don’t need all 12 ideas.
For many kitchens, a simple setup is enough.
If you’re not sure where to begin, start with four basic elements:
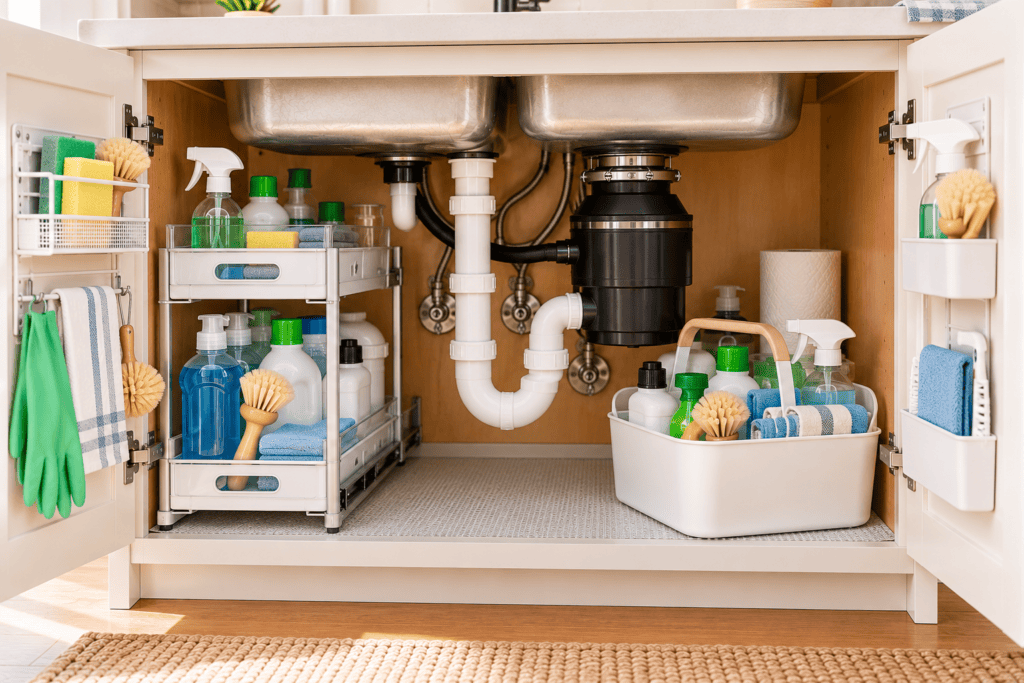
One side: A two-tier pull-out organizer for smaller supplies.
Other side: A portable caddy for tall bottles and everyday cleaners.
Cabinet door: A few hooks or a shallow organizer for gloves, cloths and brushes.
Cabinet floor: A water-resistant liner or mat to make everyday spills easier to manage.
Then stop.
Use the cabinet for a while before adding more storage.
If something is still difficult to see, reach, or put away, add another solution specifically for that problem.
The goal isn’t to fill every available inch. It’s to make everything you regularly use easy to see, easy to reach, and easy to put away.
Under-Sink Organization FAQs
What should you store under the kitchen sink?
The cabinet under the kitchen sink can be a convenient place for frequently used dish-care and cleaning supplies, provided the products are appropriate for that location and stored according to their labels.
Depending on your household and cabinet setup, that might include sponges, brushes, cleaning cloths, dishwasher supplies, trash bags, gloves and commonly used cleaners.
Instead of storing everything you own under the sink, focus on the things that make sense to keep close to the kitchen cleanup area.
What shouldn’t you store under the kitchen sink?
Avoid treating the under-sink cabinet as a catch-all.
Moisture and plumbing make it different from an ordinary kitchen cabinet, so consider whether an item is appropriate for that environment before storing it there.
Follow storage directions on household products, and choose another location for anything that shouldn’t be exposed to potential moisture or isn’t appropriate for your particular household.
How do you organize under a sink with a garbage disposal?
Treat the garbage disposal as another fixed obstacle rather than trying to organize around the entire cabinet at once.
Measure the usable space on either side of both the disposal and plumbing. You may find that a narrow two-tier organizer fits well on one side while a cleaning caddy or a few taller bottles work better on the other.
Asymmetrical storage is perfectly fine.
Your organizers don’t need to be centered or matching. They need to fit the usable spaces you actually have.
How do you organize under a sink without installing anything?
You can make a significant difference without drilling or permanently mounting anything.
Try a combination of clear open-top bins, a handled cleaning caddy, a freestanding shelf riser, a small Lazy Susan, or a properly fitted tension rod.
Start with the simplest solution that addresses your biggest problem and add more only if you need it.
The Bottom Line
Under-sink organization is all about working around the obstacles instead of fighting them.
Pipes, garbage disposals, cabinet hinges, and awkward corners may prevent you from using a traditional shelf system, but they also divide the cabinet into smaller storage zones that can be organized individually.
Start by emptying the cabinet and measuring carefully.
Then choose one or two solutions that address your biggest problem.
Maybe that’s a pull-out organizer that finally makes the back of the cabinet accessible. Maybe it’s a simple caddy that keeps everyday cleaning products together. Or maybe you just need a few clear bins so the dishwasher tablets stop disappearing behind the trash bags.
You don’t need a cabinet full of matching organizers.
You need a system that fits your cabinet, your plumbing, and the things you actually use.
And once everything has a sensible place to live, that awkward cabinet under the sink can become one of the hardest-working storage spaces in your kitchen.